


Table of Contents
Timeline
When will this be released?
Jun 16, 2026
Is there downtime for this release?
No
Features & Enhancements
Time Off Balance Import
Bulk upload Time Off Balances from 3rd party systems, or use this tool to perform an initial upload of balances.
Value Statement
Keeping PowerTime time off balances in sync with 3rd party software can be incredibly time-consuming if you have to manually maintain each employee’s individual bank balance, especially if your agency has hundreds of users with several time off banks. Rather than updating them one by one, use the Bulk Import Tool to make large-scale adjustments to employees’ time off balances instantly.
Audience
This tool is only available to users with explicit administrative permissions.
Enablement and Navigation
Administrators must enable this option under System > General Setup > User Roles.
- Navigate to the Base permission that you want to assign it to.
- Click Modify > Permissions.
- Scroll to the Time Off section and enable the permission Time Off Balance Import Tool Generic.
Note: Assign this permission to the correct set of users. For example, if you want all administrators to access this tool, apply the permission to the Administrators Base role. If you only want specific users to have access to this screen, you may click “Add User Role” and apply the role to specific users.
Whatever user roles have permission to view this page can access the import tool by navigating to Time Off > Balances > Import Tool.
Examples and Use:
Preparing Your Import File
A set of instructions is available on how to use this page directly within the interface. To begin formatting your data, click the Download Template button located at the top right of the “Time Off Balance Import” window.
When you click this button, you will download an Excel file with specific columns. Populate the information on this file using the following guidelines:
- Employee ID (Required): Maps directly to a PowerTime employee ID field. You can copy employee IDs from your 3rd party software or use a PowerTime report, such as the Employee Field Excel File, to gather the correct Employee IDs.
- Employee Name (Optional): Enter an identifier into this field that will help you associate the Employee ID with a specific user. This field is not required and is considered a helper field. You can include this name in any format; the system will not look at this column during the upload process, as it is strictly a visual indicator for the user working inside the document.
- Bank ID (Required): Maps directly to the Time Off Bank Name. If your 3rd party system uses a different name from the PowerTime Bank Name, it maps to the Import File Match field. You can configure this mapping criteria by navigating to Time Off > Setup > Banks, modifying the desired bank, and defining the value under the Import File Match field.
- Hours (Required): The exact number of hours the bank balance will be credited or reset to.
Configuring Import Options
Before clicking the Upload button, you must define your mapping and update rules using the two dropdown menus on the page:
- Bank Update Dropdown: Displays the following options to determine how the hours are applied:
- --Choose an option-- (Default, no value)
- Reset
- Credit
- Requirement: The admin must select either Reset or Credit before uploading. If you click Upload without selecting an option, a red toast error message is displayed.
- Employee ID Mapping Dropdown: Displayed next to the Bank Update dropdown, this tells the system which PowerTime field maps to the Employee ID column in your file.
- Payroll ID (Default option)
- Dynamic Options: Additional options are automatically populated from the custom fields configured in PowerTime (e.g., Custom Field: Employee Number, Custom Field: Indicator).
Uploading and Reviewing Changes
Once the file is uploaded, the system will open a preview screen or present you with a list of errors. If there are errors, you must fix them directly on the .xlsx file and reupload until no error messages persist.
The system checks for the following possible errors:
- Duplicate rows: Triggered if both the Employee ID AND Bank ID match for 2 or more rows in the file.
- Invalid Bank ID: Triggered if the Bank ID on the import file does not match with either the Time Off Bank Name or the Import File Match field configured in PowerTime.
- Employee ID Mapping: Triggered if the Employee ID in the file cannot be found within PowerTime based on your selected mapping dropdown.
Once no errors remain and you click Submit, the updated balances are finalized and will be reflected on the user's time off balances.
Considerations
Resetting or crediting hours using this tool updates the employees' Current and Actual Balances. This means that the newly uploaded balance will automatically reflect any time requested and approved in the future.
You must upload the file in the .xslx format. If you do not have Excel, a good free option is to populate the file in Google Sheets, and then use the Download option to save it to your computer as the .xslx format.
Vehicle Checklists - Save Progress, Delete, and Modify
Employees can now save your progress on any checklist mid-way through and return to it exactly where they left off, and supervisors can modify previously submitted checklists to correct errors without starting over.
Value
Vehicle checklists are easily disrupted by emergency calls, shift changes, or equipment issues. Instead of forcing employees to lose their work and restart a lengthy form from scratch, this update allows users to capture their current state and resume later. Additionally, administrators can now easily modify or restore checklists, saving time and removing the need for users to perform repeat submissions.
Audience
- All Employees: Can save draft checklists and resume or discard them as needed.
- Administrators/Power Users/Supervisors (Users with All Checklist History access): Can modify completed checklists, delete entries, and view or restore deleted history.
Enablement and Navigation
This feature is automatically active for any user with existing access to vehicle checklists and checklist history.
- To enable this feature, administrators can navigate to System > Settings > Features to enable Vehicle Checklists.
- After enabling, log out and back in to configure vehicles and vehicle checklists by navigating to System > Vehicle Setup.
- Employees can submit or resume a checklist by navigating to My Information > Forms > Vehicle Checklist.
- If you need to assign a user with Normal access to supervisory functionality, you can assign any user to the Vehicle Checklist Supervision screen by navigating to System > General Setup > User Roles.
- There are “Built-In” roles for Vehicle Equipment Problems Manager & Vehicle Maintenance Problems Manager.
- Click Modify on either.
- Click Permissions.
- Ensure role SP010 is enabled under the Supervision heading, and roles VEH001, VEH002, VEH004, VEH005, and VEH007 are enabled.
- Click the Employees button to assign the role to individual employees.
- To manage, modify, or restore checklists, navigate to Supervision > Vehicle Checklists > All Checklists.
Examples and Use:
Saving and Resuming as an Employee
When filling out a vehicle inspection, you can pause your work at any time.
- Saving Progress: A Save Progress button is available in the submission form footer.
- This button becomes active as soon as a vehicle is selected.
- It can be used at any point, even if the rest of the form fields are empty.
- Clicking it captures your current data, keeps the form open so you aren't navigated away, and triggers a notification.
- Saving multiple times updates your current draft; it will not create duplicate entries, and it preserves the original date and time the checklist was started.

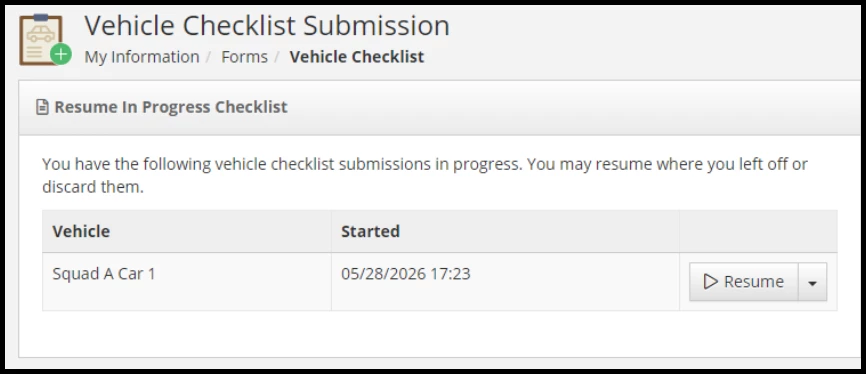
- Resuming a Draft: If you have one or more saved drafts, a Resume Checklist Submission panel will appear at the top of your submission screen. If no drafts exist, this panel remains hidden.
- The table displays the Vehicle, the Started Date (earliest first), and an Action column.
- Click Resume to load the form with all your previously populated information. This removes the row from your draft history list. Once you complete and officially submit the checklist, it is permanently removed from the draft panel.
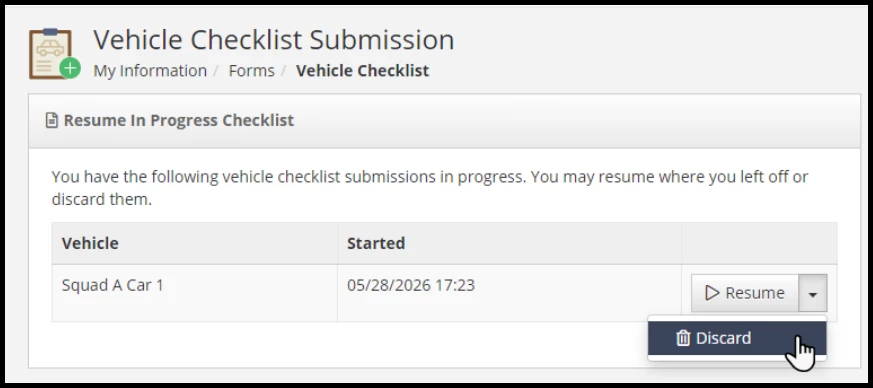
- Discarding a Draft: In the Resume dropdown next to a draft, you can select Discard Draft.
- A confirmation modal will appear confirming you want to permanently remove the checklist without recording it.
- You can click Cancel or the (×) button to close the modal, or click Discard to permanently delete the draft. If it was your last remaining draft, the resume panel will disappear.
Modifying and Deleting Checklists as a Supervisor
Users managing the All Checklist history screen will now see two distinct tabs: Completed Checklists and Deleted Checklists.

You will notice some changes to the columns and button on the Completed Checklists tab.
The old "View" column header is now labeled Action. Some changes have been made to the button on this screen.
- View: The primary action to review the submission details.
- Modify: Redirects the supervisor back to the Vehicle Checklist Submission form with the existing data loaded. You can change information within the fields and resubmit the form on the employee’s behalf. Note: You cannot use "Save Progress" on a checklist that has already been finalized and submitted.
- Delete: Opens a confirmation modal warning you that the checklist will be moved to the deleted tab.
- Confirming the deletion removes the row from the completed table, triggers a "Checklist Deleted" toast notification, and moves the record to the deleted tab.
Users can take 2 primary actions from the Delete Checklists tab:
- Restore: The primary action button that immediately returns the checklist to active status back on the Completed Checklists tab.
- View: Allows you to review the deleted checklist's details exactly as you would on the completed tab.
Considerations
- The save progress action does not currently save notes in the “Report Vehicle Problem” and Report Equipment Problem” sections.
Administrative Enablement of Department Support and Payroll Groups
We have streamlined the system configuration experience by moving the Department Support and Payroll Groups settings so that administrators no longer must contact PowerTime support to enable these features.
Value
As PowerTime grows, we want to make it as easy as possible for administrators to find and manage core functionalities. Moving these options to be user facing and into the centralized Features page ensures a more organized setup experience without disrupting your current operations.
Audience
Administrators may enable these features.
Enablement and Navigation
No action is required to maintain your current setups, as all existing configurations are preserved. To enable these features going forward, navigate to System > Settings > Features.
Examples and Use:
Department Support
- Functionality: Clicking Enabled will add the Department option to the System > General Setup area upon your next login.
- Click More Info next to this setting displays the following guidance: "Enable this feature if your agency has multiple departments; you might do this if you want schedule privacy or to help supervisors manage approvals from employees they supervise."
Payroll Groups
- Functionality: Clicking Enabled will add the Payroll Group functionality to the System > Settings > Payroll > Payroll Groups (on the left) area upon your next login.
- Click More Info next to this setting displays the following guidance: "Enable payroll groups if your agency has policies that require different pay periods OR varying overtime rules for employees."
Appendix: Bugs Resolved
| Feature Issue | New Behavior |
| When the last Labor Department (System > General Setup > Labor Departments) was removed, this caused some areas of PowerTime to display errors. | The last existing Labor Department can no longer be removed, preventing errors. |
| When an agency has more than 2 decimal places enabled, the Supervision > Call Off > Call Off Submission screen did not properly render the time off balances out to 4 decimal places. | Time off balances display out to 4 decimal places on the Call Off Submission screen. |