


SUMMARY
Rather than entering each of your users individually into your site, PowerDMS allows you to synchronize users from a CSV/Excel file into your system. This will save you a lot of time. This article shows you how to prepare and sync your CSV file.
CONTENT
PowerDMS SYNC can upload or modify users in PowerDMS in bulk using a CSV file. Below are some guidelines on preparing your CSV file for use with PowerDMS SYNC and for importing from the CSV file once it's complete.
| Note: If you have not already downloaded PowerDMS Sync to your computer, you will need to do so before continuing with the steps below. To learn how to download this program, please see our Introduction to PowerDMS Sync article in the Related Articles section below. |
Preparing Your CSV File
Typically, the easiest way to prepare a CSV file is to use Microsoft Excel. Often, a good starting point is getting an Excel report from another program, such as an HR management system, which includes all your users and their email addresses. A good tip is using the Excel Concatenate/Concat formula and Find and Replace tool to more quickly organize your files (Please see our linked Related Articles below for more information on how to use these functions).
Requirements for each Excel field are listed in our PowerDMS Sync Field Notes article which is linked below in the Related Articles section.
Your spreadsheet should look similar to the example below. If you need further guidance, PowerDMS can provide you with an Excel file template.
| Username | FirstName | LastName | | Location | Group Membership |
| jdoe | Jane | Doe | jdoe@organization.org | Operations | Supervisors |
Saving Your Spreadsheet as a CSV File
-
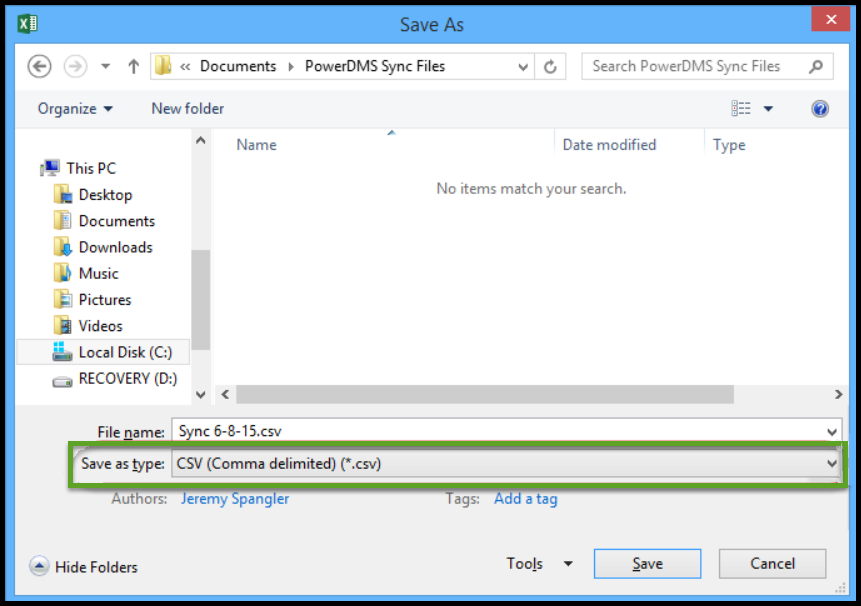
Once your Excel spreadsheet has all the information you need for all your users, select File > Save As.
-
In the window that appears, under the Save as type field, choose CSV (Comma delimited).
-
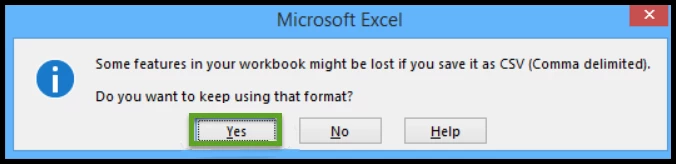
Click Save. A pop-up box will appear, notifying you of format changes. Click Yes.
-
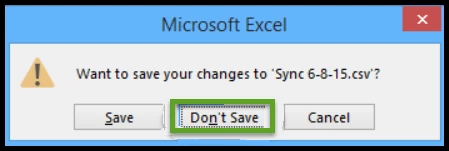
Close the Excel file. Another pop-up box will appear, asking you to save the file. Click Don't Save or No (depending on your version of Excel).
Syncing Your CSV File
-
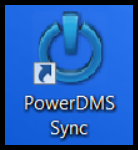
Open PowerDMS SYNC icon from your desktop by double clicking the PowerDMS SYNC icon. If you are an administrator on that computer, right-click the PowerDMS SYNC icon and select Run as administrator. To continue, enter the username and password used on that computer.
-
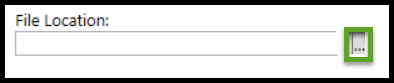
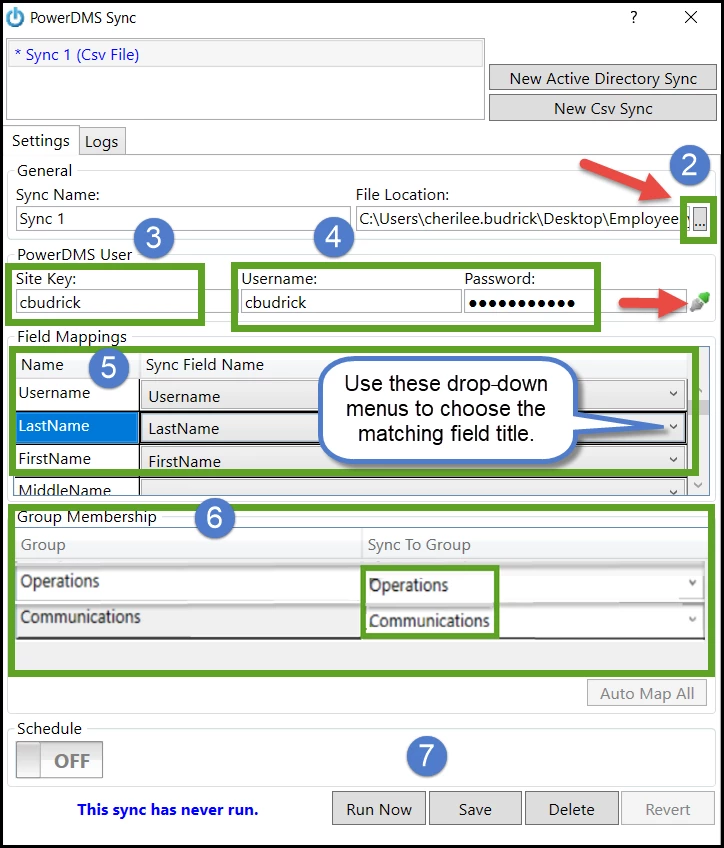
Select New CSV Sync. Browse for your CSV file by clicking the three dots to the right of File Location.
-
(Refer to the image above for steps 2-7.) Enter your Site Key. If you don't know your site key, you can find it under Administration Menu > Licenses.
- Enter your Username and Password. You'll know your Site Key, username and password are correct when you see an icon of two green plugs (
 ) to the right of the password field.
| Note: The username and password must be for a Master Administrator. For auditing purposes, it may be beneficial to set up a Master Administrator account solely for use with the Sync tool. |
-
Under the Field Mappings section, check that the field names in your CSV file (Sync Field Name) are matching the corresponding fields in PowerDMS.
-
If you're syncing to any groups, ensure that the groups named on your CSV file are mapped to the corresponding groups in PowerDMS.
- Click Save, and then Run Now.
- The Sync tool will let you know how many users were successfully synced. Click OK. If any issues were found, viewing the logs from the sync will help you identify the problem.

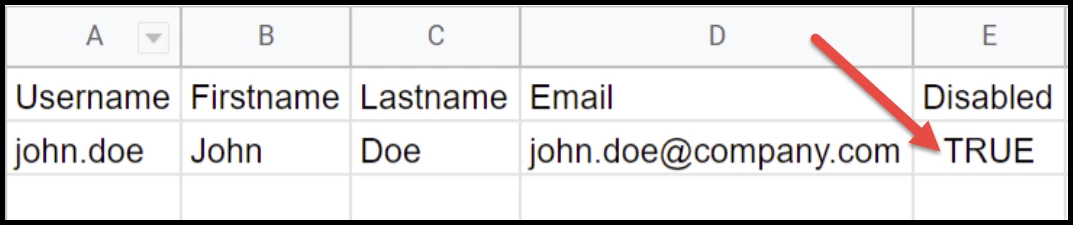
Disabling a User
-
Users that are to be disabled in your CSV file need to have a value of TRUE under the Disabled column.
-
Upon your next sync, the tool will read the value of TRUE in the Disabled column and automatically disable the user in PowerDMS.
RELATED ARTICLES
Video: PowerDMS Sync
Article: Introduction to PowerDMS Sync
Article: Scheduling Automated Syncs
Article: PowerDMS Sync Field Notes