


Table of Contents
Timeline
When will this be released?
Jun 23, 2025 1:00 PM PDT
Is there downtime for this release?
No
Survey-Responses Dashboard
Overview of the Survey Responses Dashboard in Engage
The Survey Responses Dashboard provides a view of each Survey Response in a spreadsheet format. This view will let you filter Survey results to get more information about responses. How it works:
- Export the Survey Responses to be used in a different reporting tool.
- Compare responses to one question with responses from later questions (see if Call Takers and Responders received similar ratings).
- If you ask Demographic Questions in your survey, you can compare responses from each demographic
- Check which questions survey responders most frequently stop responding to to ensure your prioritize your most important questions.
- Filter for specific Personnel to view multiple survey responses at once.
- Compare CPSS based on the Encounter time of day and/or response shift
- Filter responses and Satisfaction by Geographic Area and Incident Type.
Using the Survey Responses Dashboard in PowerEngage
-
Use this link: Survey-Responses Dashboard
-
OR Go to Measure in the Menu
-
In the top row, choose Survey> Responses on the far right.
-
-
Choose a Date Range for your export by updating the Start Date and End Date.
-
PowerEngage defaults to the Last 30 Days.
-
-
The data displayed in the chart will be one row for each survey received for the given date range.
Definitions of Columns within the Chart:
-
Response Date: The date the survey was responded to.
-
Contact Information: The phone number or email address of the survey responder.
-
Incident Number: The CFS Number or Case Report Number the survey is associated with.
-
Incident Date: The CFS date or Case Report Date.
-
Agency: The agency associated with the Encounter.
-
Jurisdiction: The jurisdiction associated with the Encounter.
-
Incident Type: The Incident Type associated with the Encounter.
-
Incident Type 2: The Incident Type 2 associated with the Encounter.
-
Incident Sub-Type: The Incident Sub-Type associated with the Encounter.
-
Caller Method: The Caller Method associated with the CAD Encounter.
-
Caller Type: The Caller Type associated with the CAD Encounter.
-
Survey Name: The name of the survey as it displays in the Surveys configuration screen.
-
Survey Version: The version of the survey the responder replied to (likely the Active version on the Surveys configuration screen).
-
Question 1 Question: The first survey question.
- Question 1 Response: The response to the first question.
-
Question 1 Response Rating: If the first question is a Scale question, the rating will be Positive or Negative. If the first question is not a Scale question, it will be blank.
-
Question 1 Response Sentiment: If the first question is a Comment question, possible responses include Positive, Negative, Neutral, and Mixed. If the first question is not a comment question, it will be blank
-
Question 1 Response Personnel: All personnel associated with the feedback, are listed whether it is one person or many.
Columns n-r repeat for each question up to Question 18.
-
Currently, due to database restrictions, you can only include 18 questions in the Dashboard.
-
Verify columns ii-xi by viewing the Encounter in Activity > All.
-
Cells remain empty if data does not apply (such as Incident Type or Caller Type) to that Survey Response or if the Question was not answered
-
If you want to use another reporting system (such as Excel, Tableau, Google Sheets, etc), skip ahead to Step 5 below.
-
Use the funnel icon in the upper right corner of your screen to filter data and narrow down what displays.
-
Click Apply at the bottom of the list after defining your filters.
-
At any point, use the reset icon in the upper left corner of your screen to remove any filters and reset the dates to Last 30 Days.
-
-
Click the 3 dots in the upper right corner of the screen to export the report to a CSV or Excel spreadsheet
-
The file takes a few moments to create and you will see a message when the download is ready.
-
Using a spreadsheet or reporting software allows you to further analyze the survey results.
-
-
The export downloads to your browser’s default location (usually the Downloads folder).
-
Once you find the file, you can open it, import it into a reporting system, or convert it to a different format.
Using Caller Number Rule Filters
EN-10445: Include Caller Number as a Rule Filter
Caller Number is now an option within Rule Filters in PowerEngage. You can include a filter to exclude sending messages to specific area codes and prefix combinations or even send messages to target these specific numbers.
To add to a Rule
-
To add a rule, open the Rule you’d like to add the filter to.you may also need to choose Edit as a New Version.
-
Click the Add Filter button.
-
Open the drop-down menu and select Caller Number.
-
You have the options pictured below to choose from for your filter criteria.
-
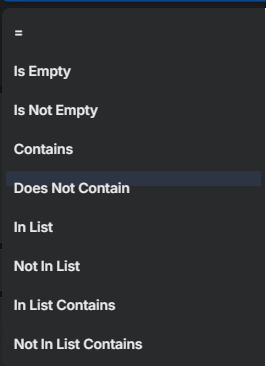
Note: Phone numbers on Encounters in Engage include the country prefix and are 11 digits. To exclude an area code and prefix, a filter could be created like this: Caller Number > Does Not Contain > +1605882