

Article Links
Security Required
Security is important to us. Your role and permissions determiney our access to screens and activities within PowerPolicy. Only users with Create Document rights in PowerDMS can import from Lexipol into your PowerDMS site.
Overview
This article will go over how to integrate the Lexipol Policy Manual into PowerDMS to conduct your assessment and update content as needed for your assessment.
Note: If you want additional users to access Lexipol documents via Contact Hub, please send the email addresses of those users with your request to support@powerdms.com.
Connecting to Your Lexipol Policy Manual Via Welcome Email
You can connect to your Lexipol Policy Manual through a PowerDMS tool called Content Hub.
Content Hub allows users who subscribe to it to share content between their site and other PowerDMS sites.
-
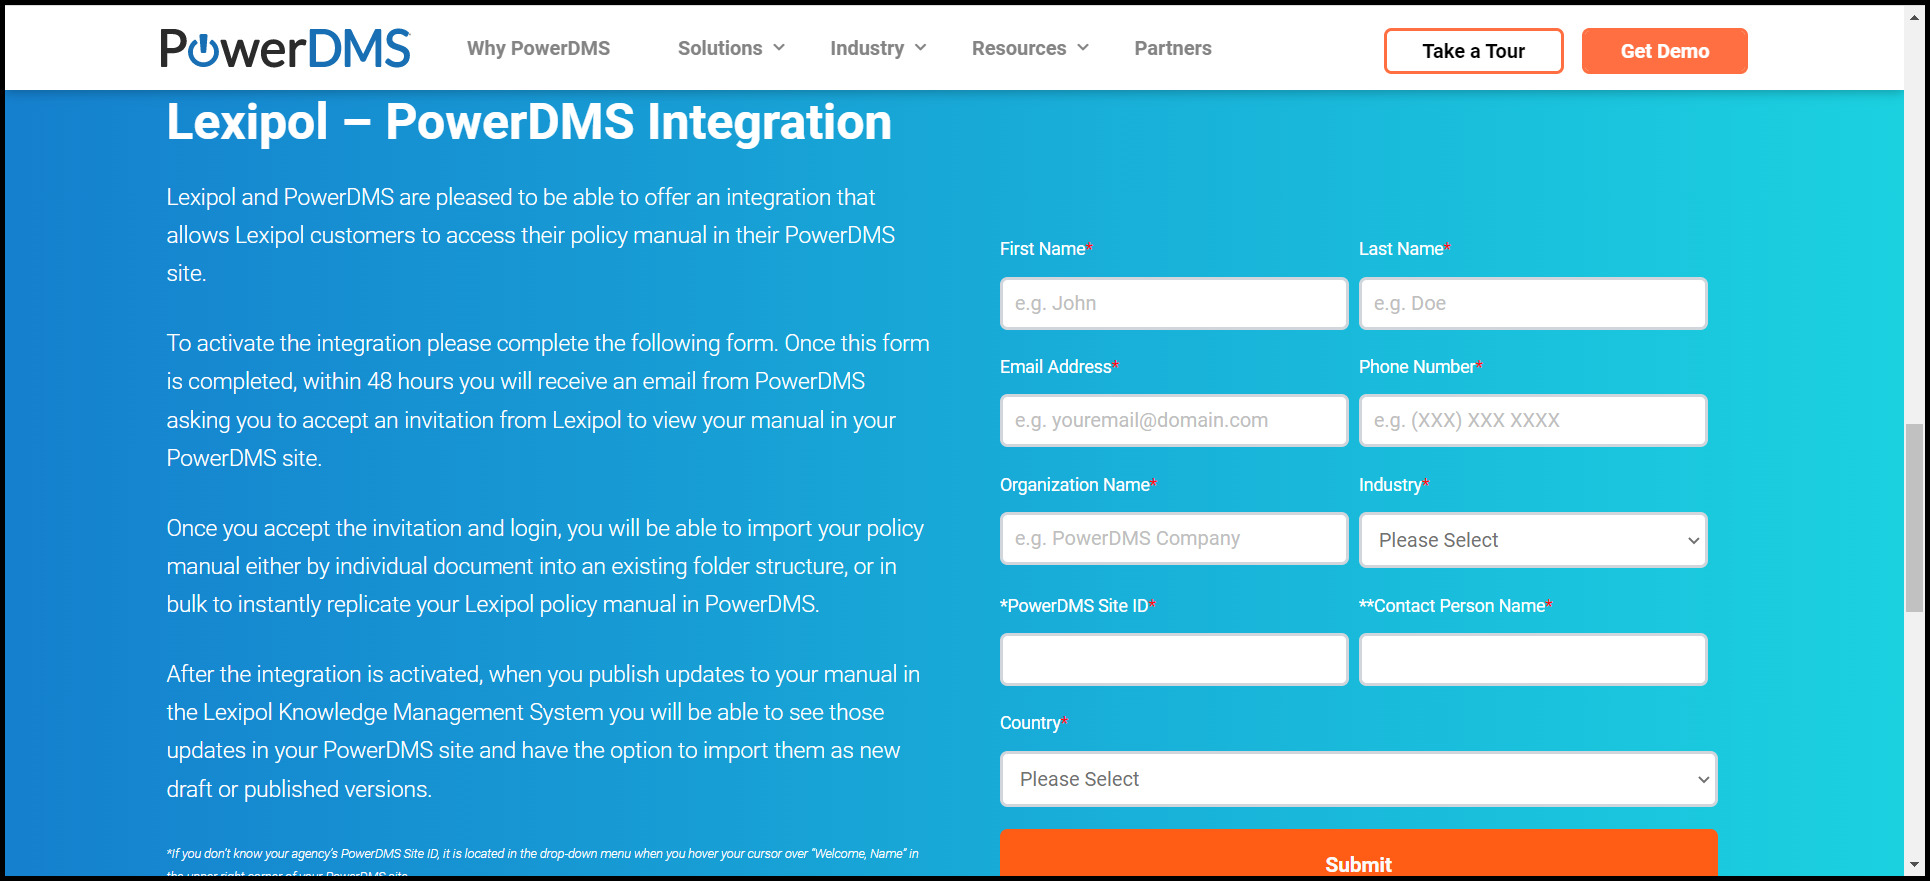
First, you must let Lexipol know you want to access its policy manual. You can do this via the online form found here. (https://www.powerdms.com/partners/lexipol)
Note: Remember that the person within your organization designated to access Lexipol's policy manual must have at least Create Document rights within your PowerDMS site to import documents from the Lexipol Content Hub site into your PowerDMS site.
-
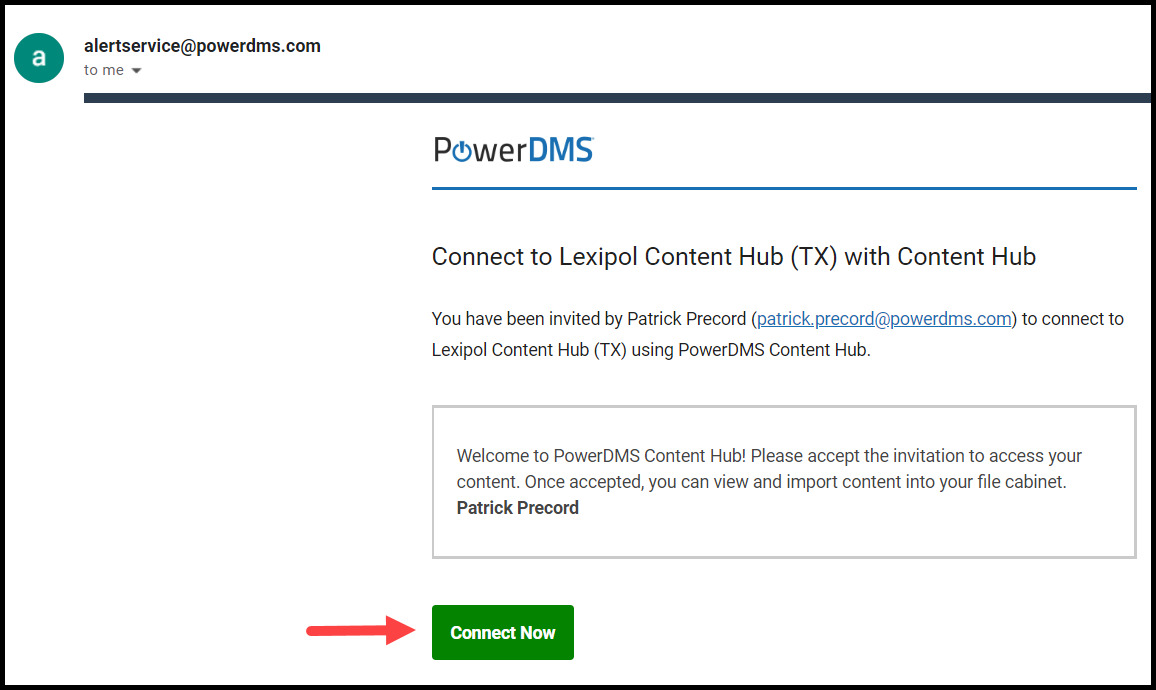
You'll receive a welcome email once your access to Lexipol's content is approved. This email will include a Connect Now button that links you to your PowerDMS site's sign-in page. This invitation will come from alertservice@powerdms.com, not from Lexipol.
-
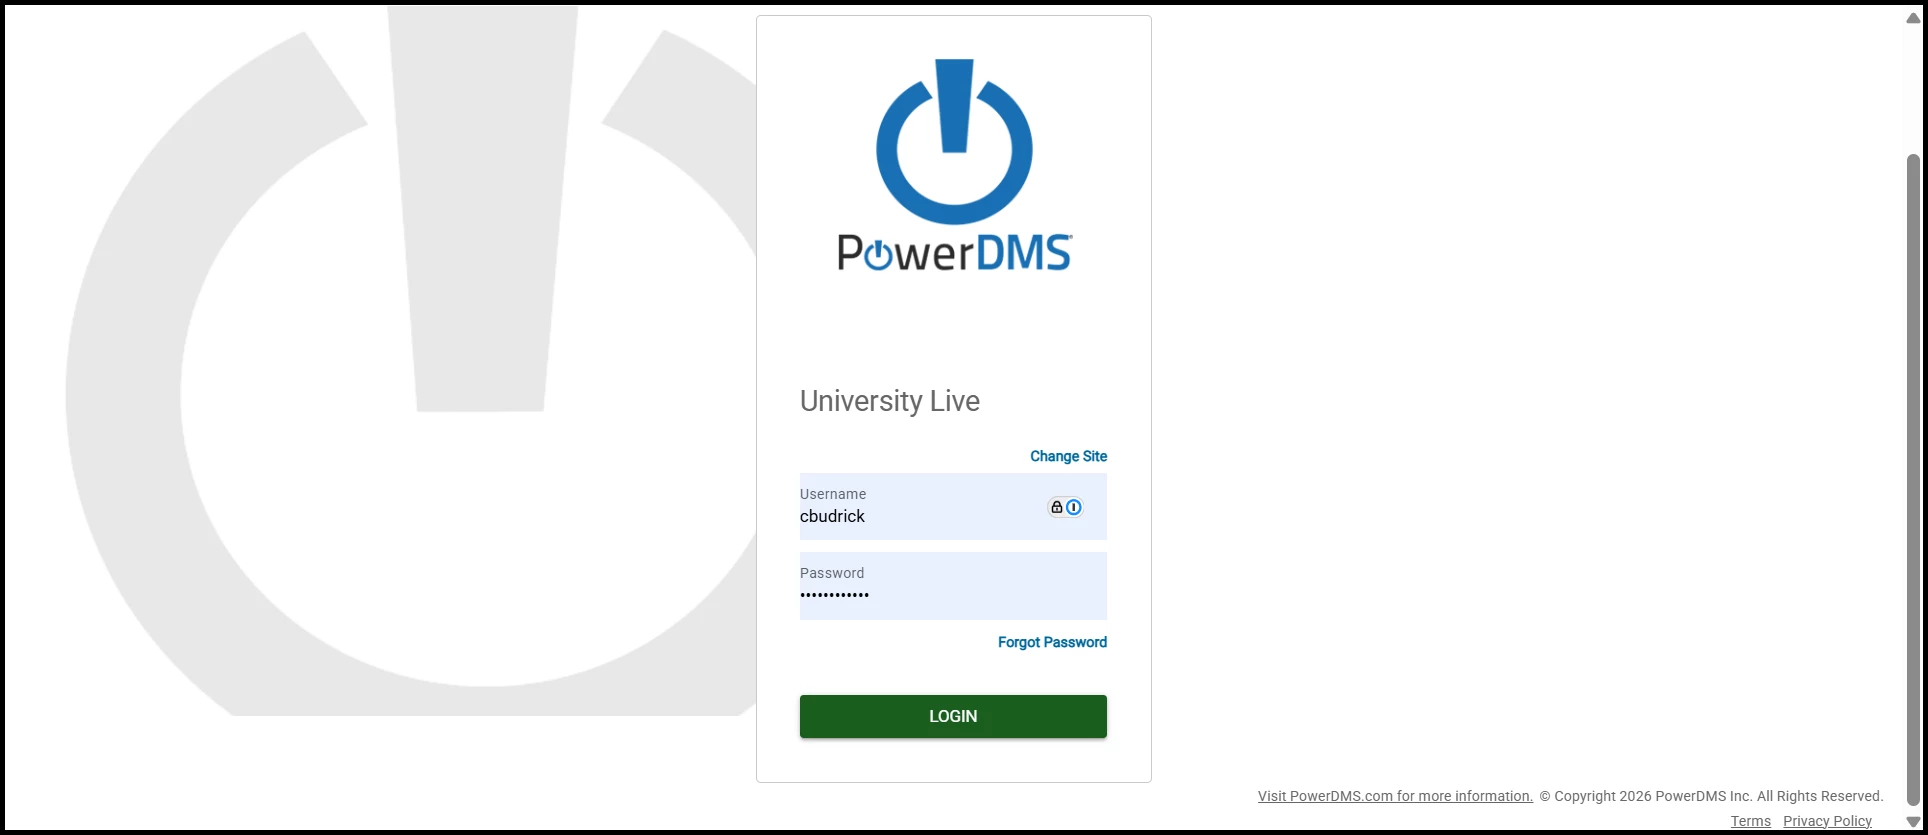
Enter your username and password for your organization's PowerDMS site on the next screen, then click Login.
-
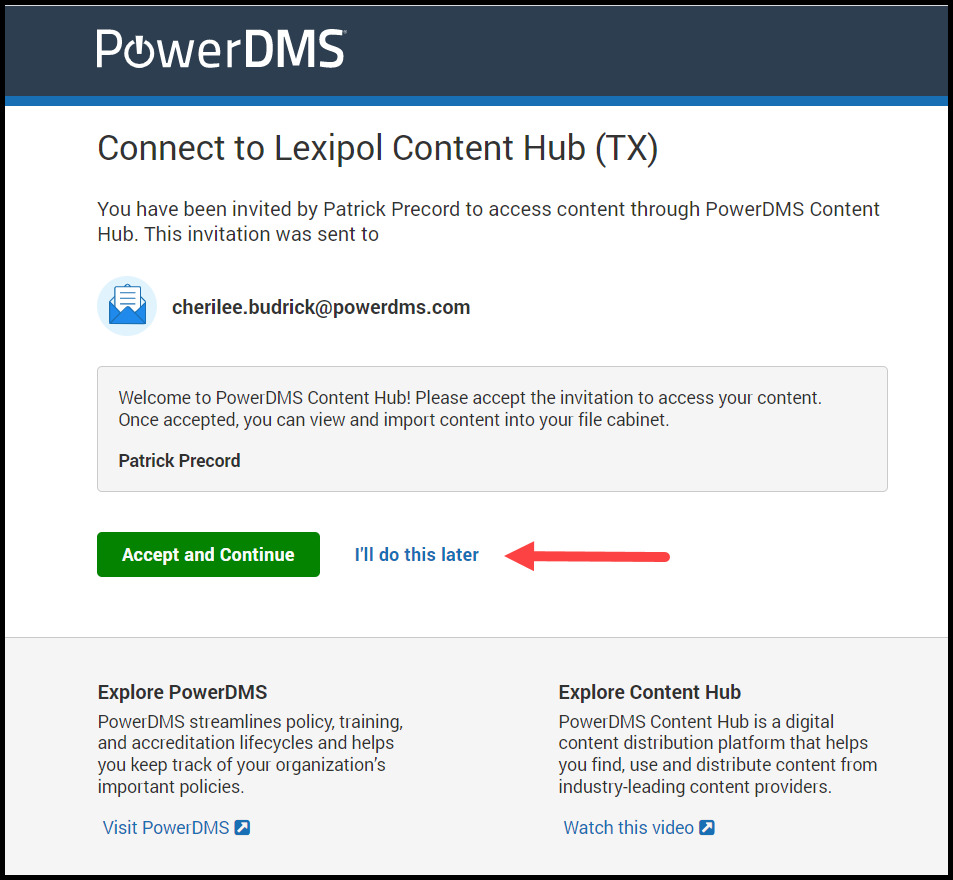
Another screen will ask you to Accept and Continue your subscription to the Lexipol site. Click Accept and Continue to continue, or I'll do this later if you're not ready to access its content. If you decide to do it later, you can return to it through the same email link you received and start again from Step 1 above.
-
Once you Accept and Continue, you can access Lexipol's content. If you click the Content Hub cloud icon in your left-side menu, the Lexipol site is visible. When you click their site name, you see and have access rights to all files Lexipol shared. The site automatically opens to the first document within the folder/document tree that Lexipol shared with you.

Importing Your Policy Manual
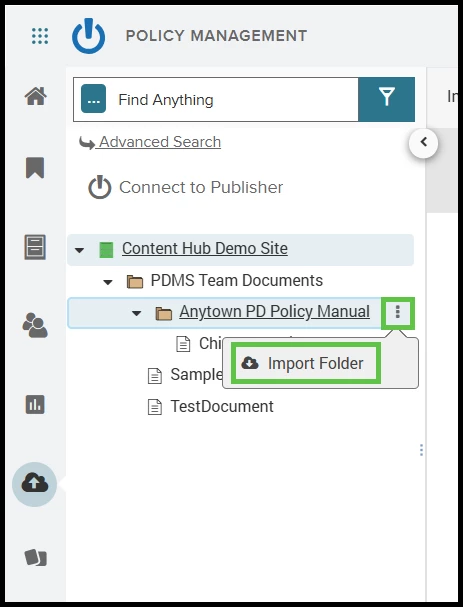
- First, determine if you want to import your policies in bulk or individually. If you already uploaded a copy of your policy to your PowerDMS site and linked it to an assessment, consider importing your policies individually from the Lexipol Sync site. To import your policies for the first time, and keep the default folder structure for your policies, hover over the folder name then click the three dots next to the folder name and select Import Folder.
- All updates to your policy manual will occur in Lexipol, not PowerDMS. Updating your policy manual in Lexipol will take approximately 24 hours to trigger the PowerDMS notification prompting you to import the updated policy. Import updates to your policies individually to the exact location as your current policy. Check your assessment for updated notification flags and update the policy attachments as necessary.
Updating Documents with Lexipol Changes
You'll receive a notification when Lexipol adds documents or makes any document changes. An orange circle appears next to the name of a changed document. If the document is within a folder, you will also see an orange circle on that folder to let you know there are document changes within the folder. When you import the changed document, make sure it has the exact same title so that you replace the prior document and don’t end up with duplicate documents.
Updating Imported Folders
Once you import a folder, you can change it and its documents within your site (modify, delete, or rename documents/folder). Lexipol will not see your changes to imported folders and documents. Remember that any folder or document changes you make will likely cause the Skip items previously imported anywhere in my file cabinet feature not to work; the system may need to recognize the changed documents/folders as the same.
Comparing Files Within Your Site
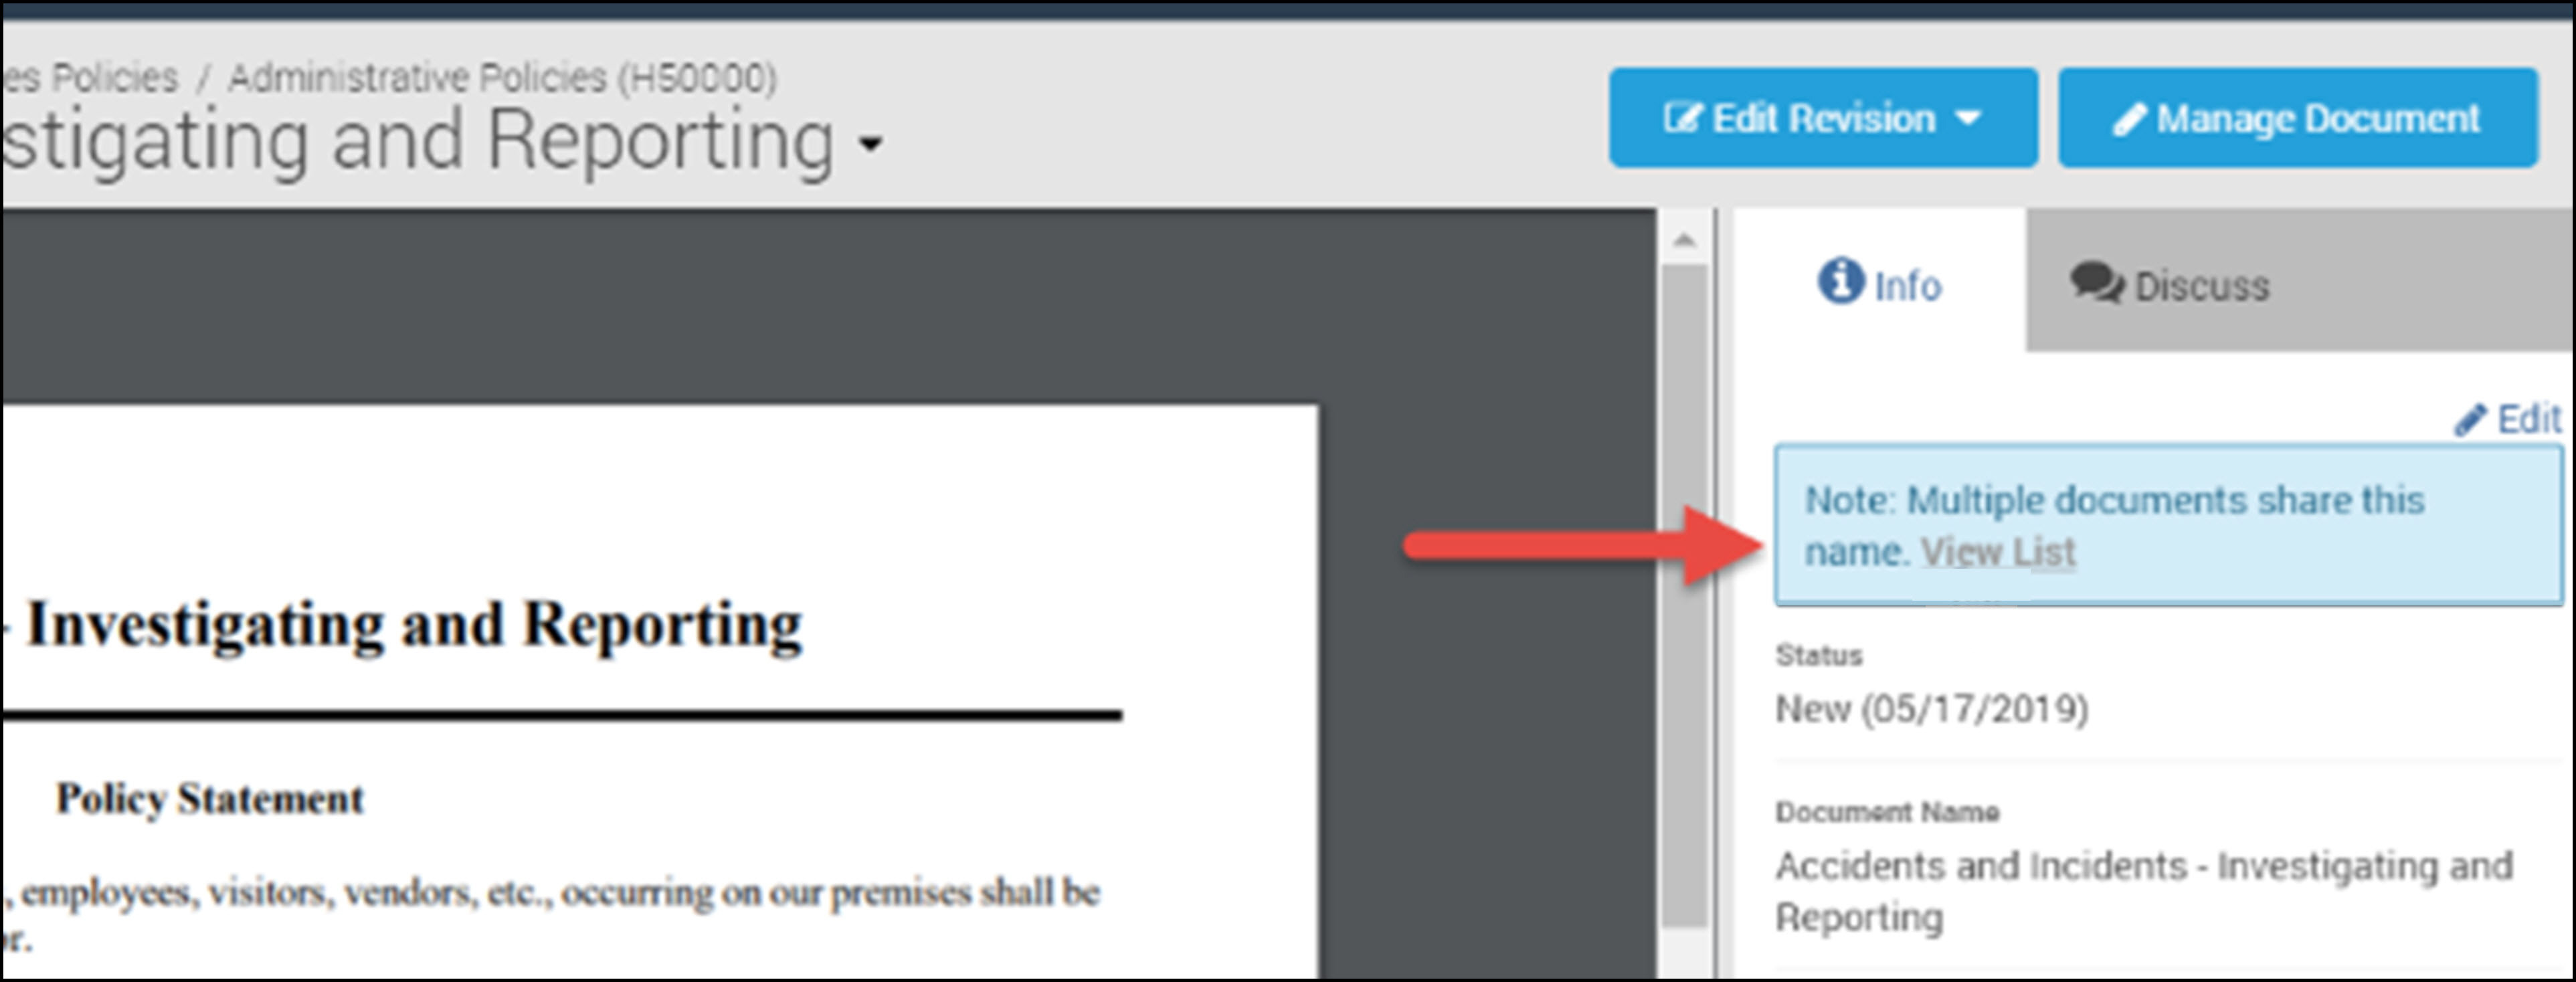
If you have the same-named file in more than one location within your site, PowerDMS will let you know. You will see a blue message box under the document's info tab. PowerDMS gives you the View List option that lets you view a list of all document versions of that same-named document. Once you select the version you want to compare, the two documents will open up side-by-side in a new window.
Comparing Your Files to Lexipol's Site
-
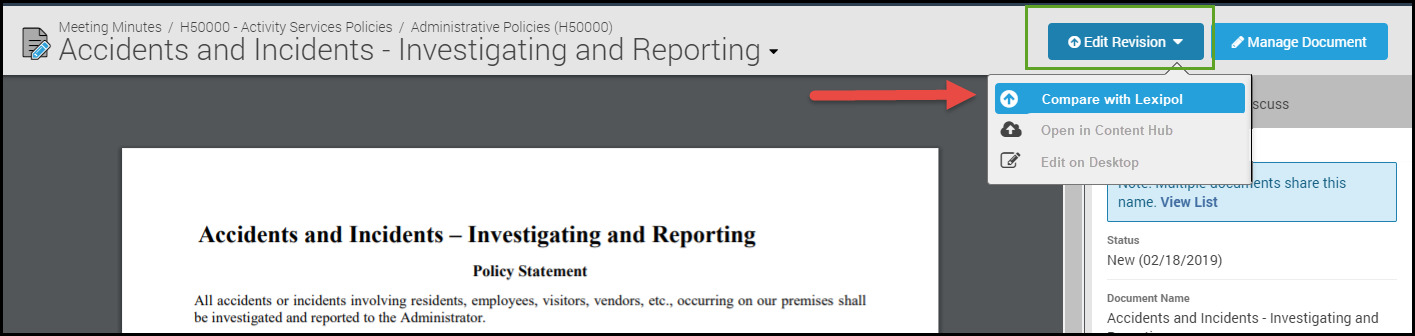
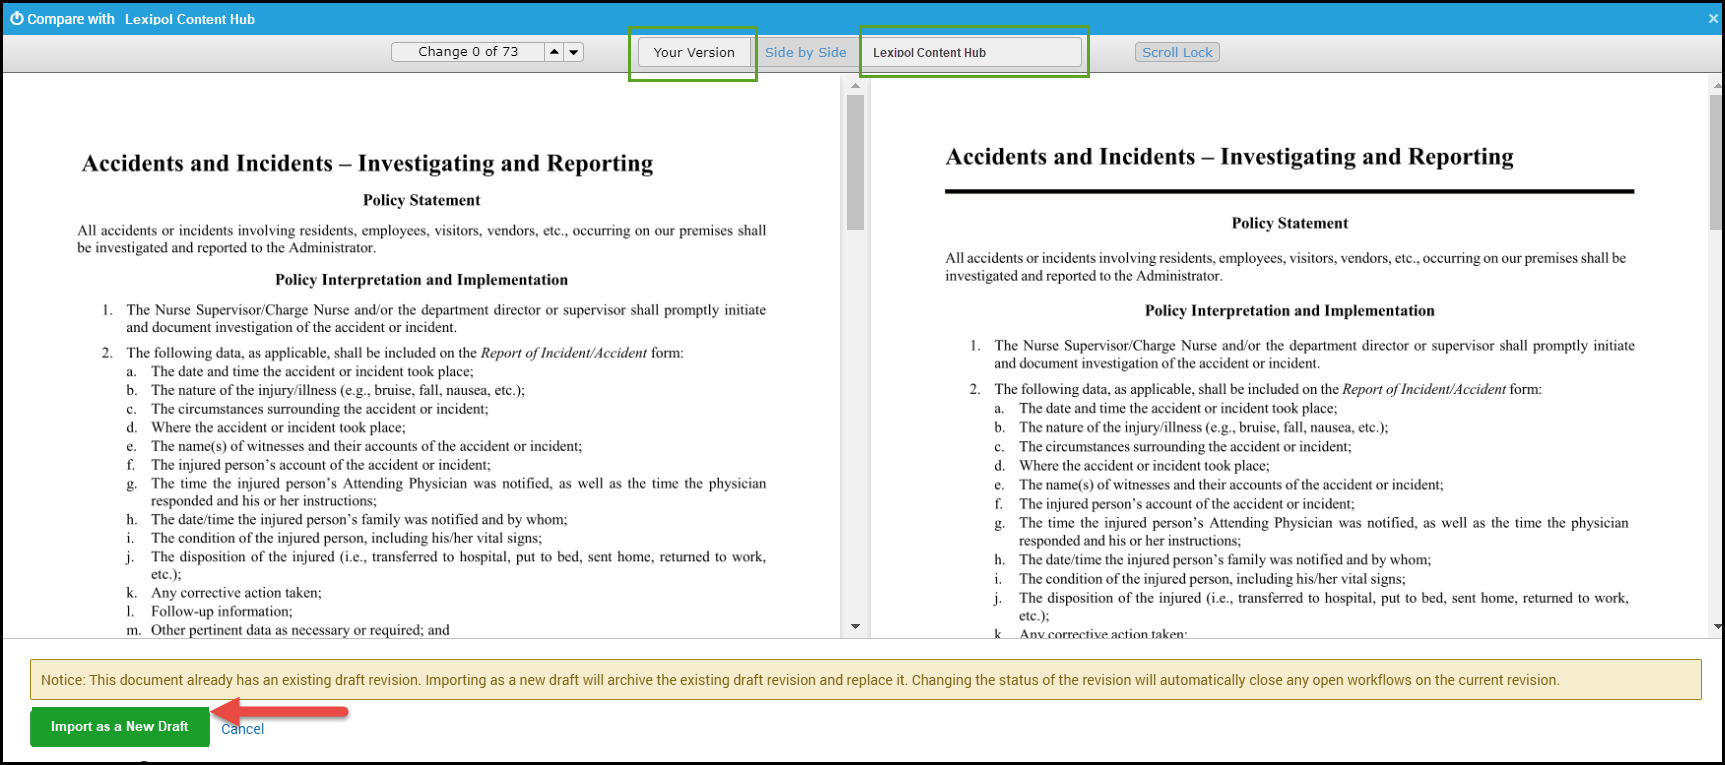
At any time, you can also compare your imported document with the document on Lexipol's site side-by-side. Click the blue Edit Revisions button in the top right corner of your screen and select Compare with Lexipol from the drop-down menu.
-
You can accept Lexipol's version by clicking the Import as a New Draft button at the bottom of the window. A new window opens with your imported document and the current version on Lexipol's site. You can then compare the two and decide whether to overwrite your version with the current Lexipol version. If you want to avoid accepting Lexipol's changes, click Cancel, and no changes will be made to your imported document.
-
Once you import a document from Lexipol's site, if Lexipol makes any changes, you will receive a notice of this. At that time, you can also choose to compare versions and decide whether you want to accept the changes or keep your current version.
Updating Assessment Attachments Linked to Imported Lexipol Documents
When Lexipol revises a document, you've already imported the changes into your PowerDMS database. That document is attached to an assessment to prove compliance with a standard. You will receive an alert in three different ways from PowerDMS:
-
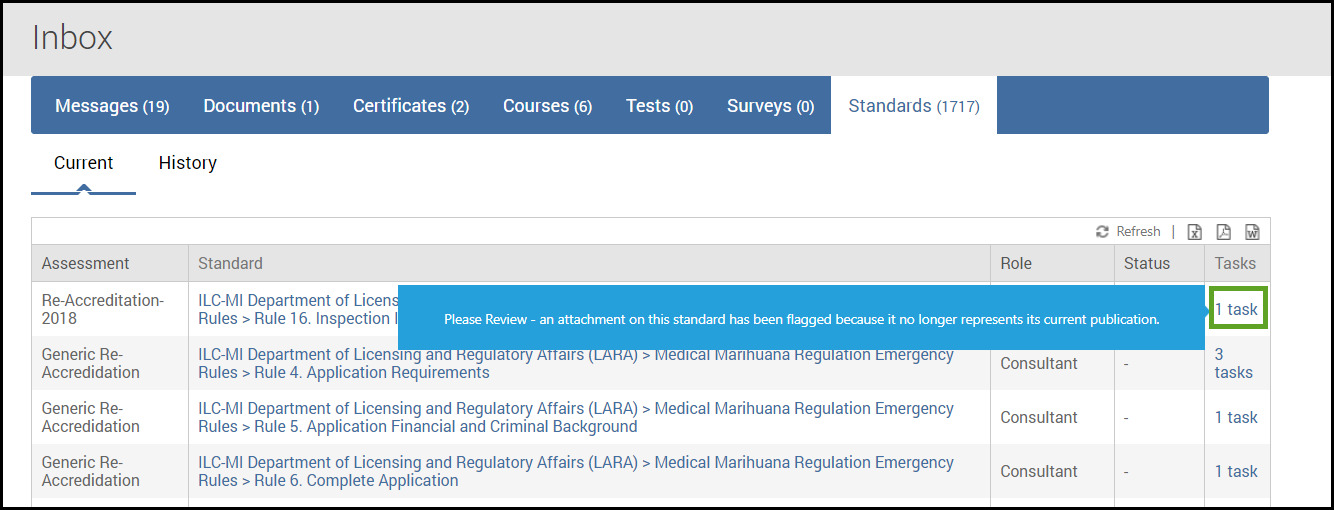
A task that appears under the Standards tab in your inbox.

-
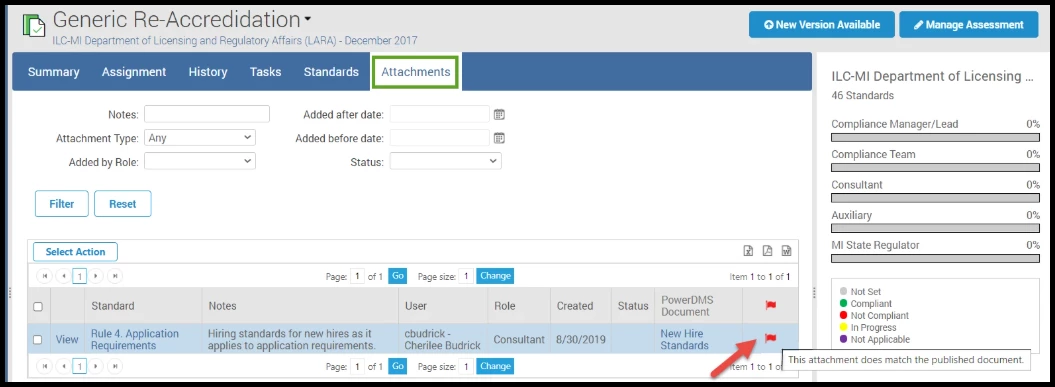
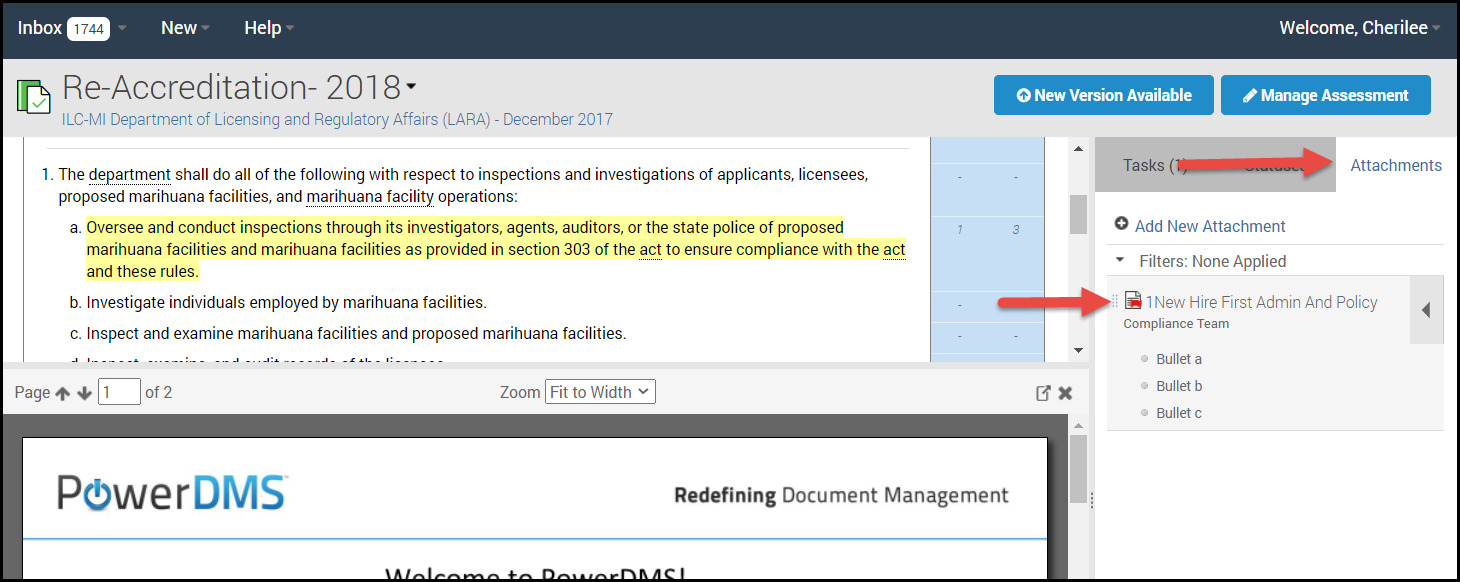
A red flag is next to the name of the updated attachment under the Attachment tab when your assessment is open in your Assessment Viewer.
-
A red pin next to the attachment name when the standard the attachment is linked to is open in the Assessment Viewer.
Updating Revised Assessment Attachments
-
From the Inbox Standards Tab: click your Standards tab to review and update an attachment from your Inbox. Click the task link next to the standard with a new attachment. The standard the attachment is linked to will open in your Assessment Viewer with a message indicating you have an attachment that needs updating.
-
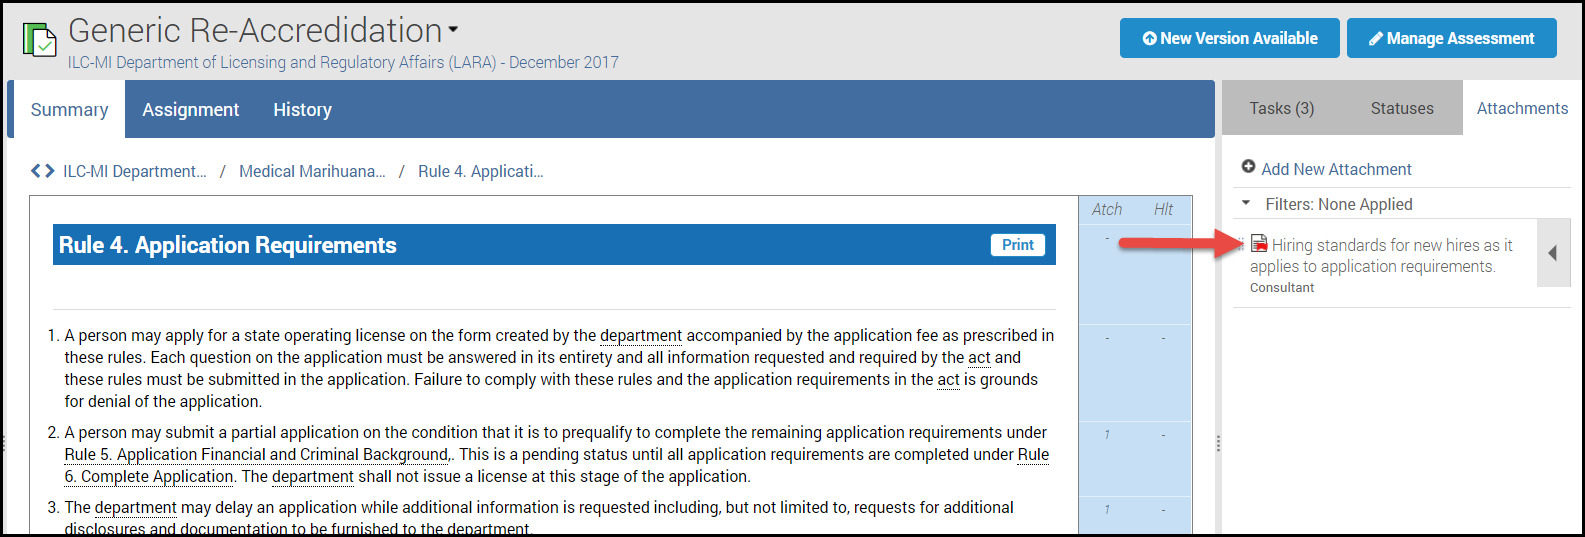
Your highlighted standard will open in the Assessment Viewer with the attachment, showing the sections that are linked to your attachment. Click the Attachments tab in the right-side menu, then click the red pin next to the attachment that needs updating.
-
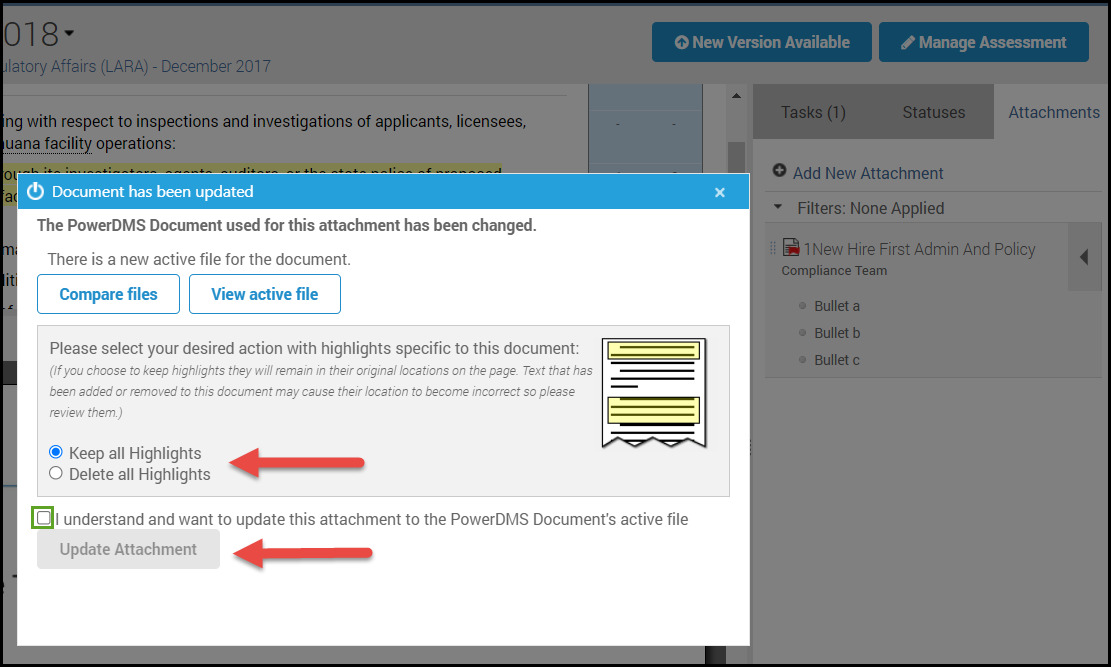
A pop-up box will open, allowing you to Compare files and View active files.

-
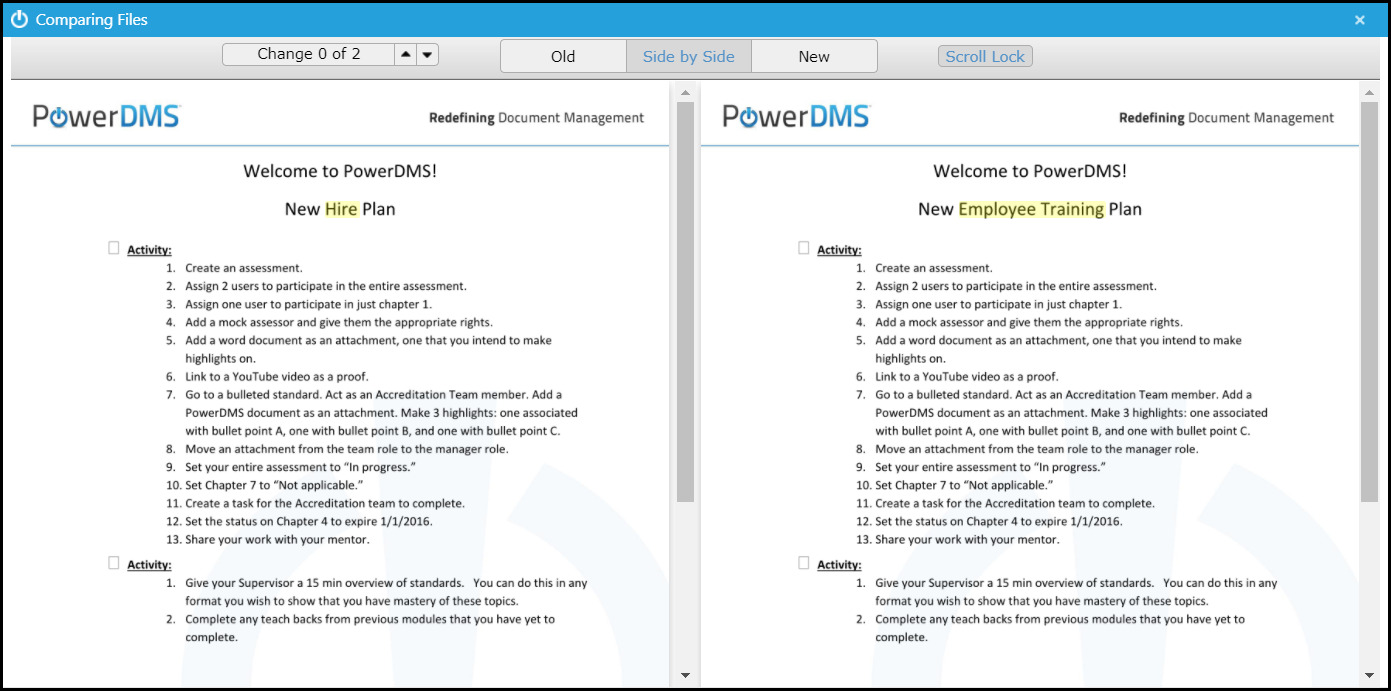
If you click Compare files, you will see a side-by-side comparison of the new and old documents with highlighted changes.
-
Once you are done viewing the changes, you can keep all Highlights and have them transfer to the new version of the document or Delete all Highlights, which means you have to go back in and re-highlight parts of the attachment that proves you've met the standard. Once you've made the appropriate selections, check the box next to I understand and want to update this attachment to the PowerDMS Document's active file, then click Update Attachment.
Updating Attachments from the Attachments Tab of the Open Standard
-
A second way to review changes made within the attachment is to click the red pin next to the document name under the Attachments tab of the standard the attachment is linked to.

-
As you had in steps 3-5 above, you can use the option to Compare files and View active files from here.
-
If you click Compare files, the new and older version will open side-by-side with the changes highlighted.
-
After you've looked over the changes and chosen whether you want to Keep all Highlights or Delete all Highlights, check the box next to I understand and want to update this attachment to the PowerDMS Document's active file and click Update Attachment. The attachment will automatically update with all changes.
Updating Attachments from the Attachments Tab of the Open Assessment
-
You can also update the document from the Attachments tab with your assessment open in the Assessment Viewer. To do so, check the box next to the attachment you want to update, click the Select Action box, and select Update Selected Attachments from the drop-down menu.
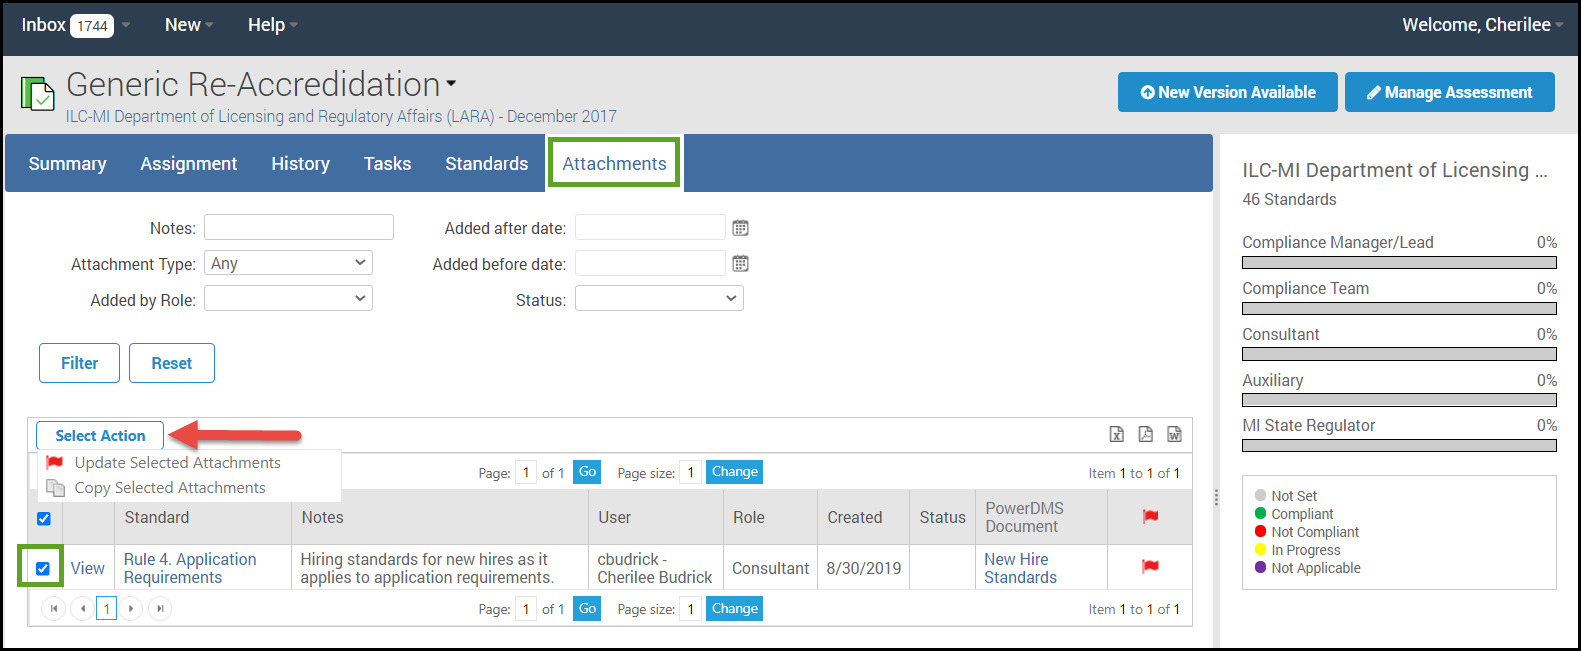
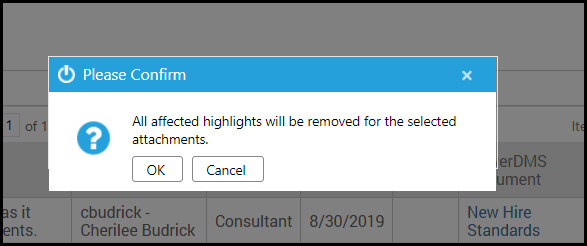
- A pop-up box lets you know that once you choose to update, all highlights made on the previous version of your document will NOT transfer to the new document. You must re-highlight any sections of your attachment that pertain to the standard. If you click OK, your attachment will be updated to the current version within your assessment (and will not include any prior highlights).
Contacting Help
Existing customers can contact their Customer Success Manager. Or contact support@powerdms.com or call 1-800-749-5104.
Related Resources
Article: PowerDMS Content Hub- User Guide
Article: Content Hub Permission Requirements
Article: Content Hub: Updating Imported Content
Article: Content Hub Connection Set Up
Article: Content Hub: Disconnecting from Publisher Sites
Video: Part 1 of 2 Content Hub Series: Accessing Content Hub
Video: Part 2 of 2 Content Hub Series: Importing Documents and Folders