

SUMMARY
This article will show you (generally your IT department) how to configure SAML for PowerDMS Single Sign On (SSO).
CONTENT
| Note: Configuring your Security Assertion Markup Language (SAML) for Single Sign On (SSO) with PowerDMS is generally done through your IT or technical department. |
The instructions below should help users from different SAML applications to be able to provide the necessary information to create an *EID connection with PowerDMS for SAML setup without issue. Once you establish a SAML/WS-FED with your site, and any time after when you navigate to your SSO Admin page, you will receive specific messaging letting you know you saved your connection.
| Note: If your screen differs from what we've shown below, it's likely nothing to worry about and is only due to you using a different provider than we've shown. It doesn't mean PowerDMS doesn't support your provider. |
Requirements Before Getting Started
-
You will need to make sure you have SAML.
-
PowerDMS only supports versions 1.1 or 2.0.
-
PowerDMS needs from you:
-
Base-64 encoded token signing cert (PEM, CER, or CERT format)
-
Sign In URL
-
You will need from PowerDMS (refer to the image below):
-
Relying party / Realm identifier urn:auth0:accounts:{siteId}-saml-connection
-
You will need to make sure you have SAML Assertion Consumer Endpoint.
-
https://accounts.powerdms.com/login/callback?connection={siteId}-saml-connection (Binding: Post)
-
You may have IDP initiated which will tell EID if you are accessing your identity provider as the initiator of logging into PowerDMS. This is an optional item.
Configuring SAML for PowerDMS SSO
-
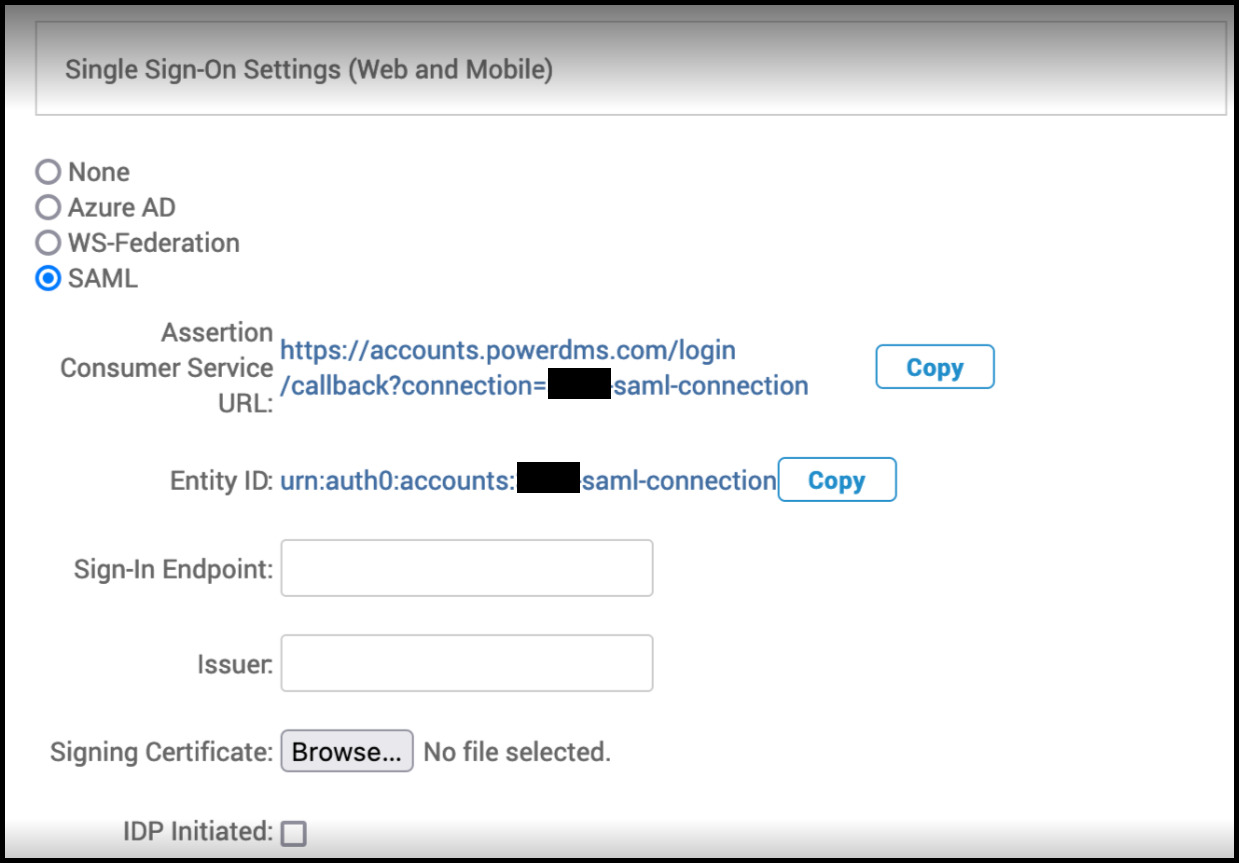
Select Administration Menu from the drop-down menu under your name in the upper right corner of your PowerDMS site. Then navigate to Site Configuration>Settings>Security>Single Sign On. On your SSO configuration page, you will see the necessary URLs needed to configure your SAML identity provider.
-
The Assertion Consumer Service (ACS) URL, also known as Single Sign On URL or Relying Party Identifier, needed for SAML configuration is available for you to copy and paste into your SAML settings.
-
The Entity ID, also known as Audience URI, is also available for you to copy and insert into your SAML settings.
-
Sign-In Endpoint, also known as Sign In URL or Sign-On URL, will be provided from your SAML identity provider.
-
Your SAML identity provider will supply you with Issuer, also known as the EntityID.
-
The Signing Certificate can be retrieved from your SAML identity provider in the form of a CER, PEM, or CERT file type.
-
If you will be initiating the login process from your identity provider, please check the IDP Initiated checkbox.
-
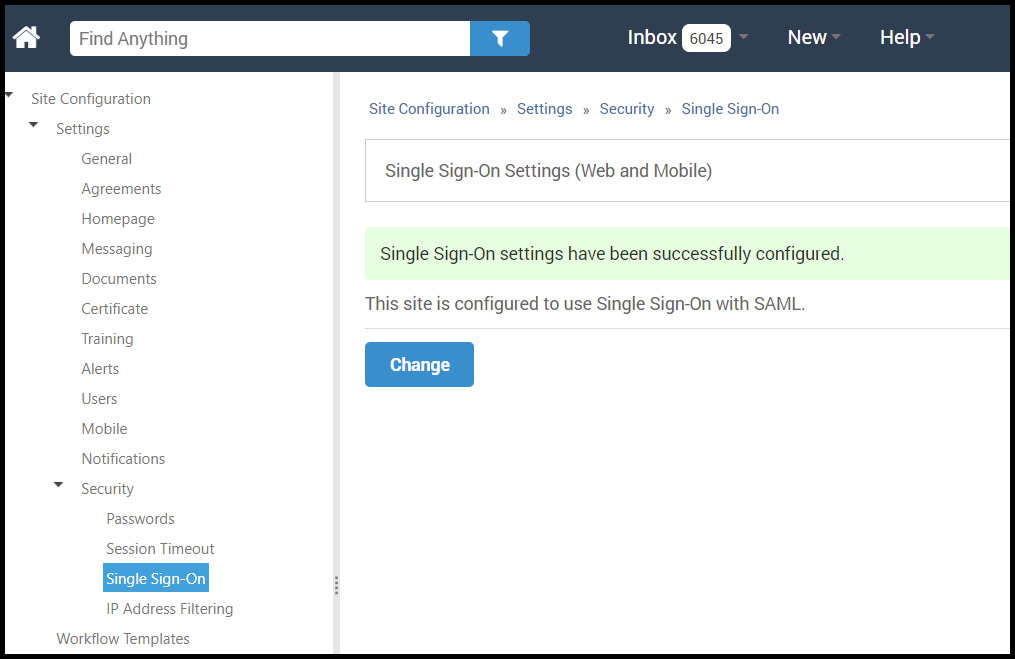
Click Save and you will see that your site is now configured with SAML
Bypassing an SSO Lock-Out
In case you ever get locked out of your SSO site, you can bypass your SSO login page by using the following link: https://powerdms.com/ui/login.aspx?siteid=YOURSITEKEYHERE&formsauth=true. For this to work, your site Administrator must turn this on for your site. After using the link, enter your sign-in credentials (username and password) into the appropriate fields on the page that appears. Then your PowerDMS site will open.