
SUMMARY
Synchronizing your users in PowerDMS is an important step to getting your system up and running. This article will show you how to synchronize using Azure Active Directory.
CONTENT
Synchronizing Users
| Note: If you currently use another sync method or already have users in your site, contact PowerDMS Support at 800.749.5104 or support@powerdms.com before implementing Azure sync. |
-
Select Administration Menu from the drop-down menu under your name in the upper right corner of your screen.
-
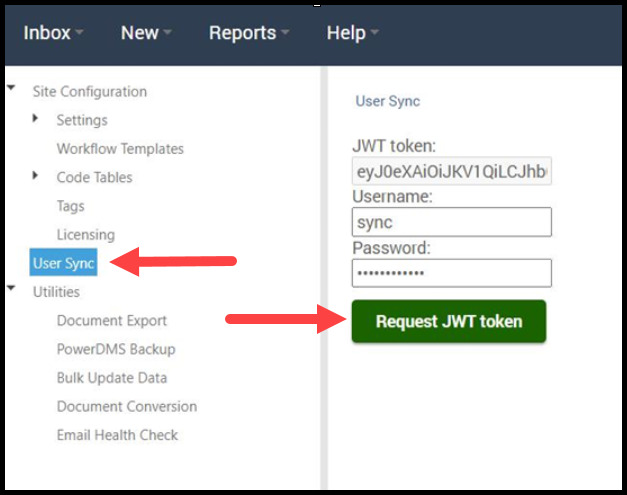
From the menu that appears, navigate to User Sync, enter the forms-based credentials for a Master Administrator account, and click Request JWT Token.
-
Copy this token value for later use.
-
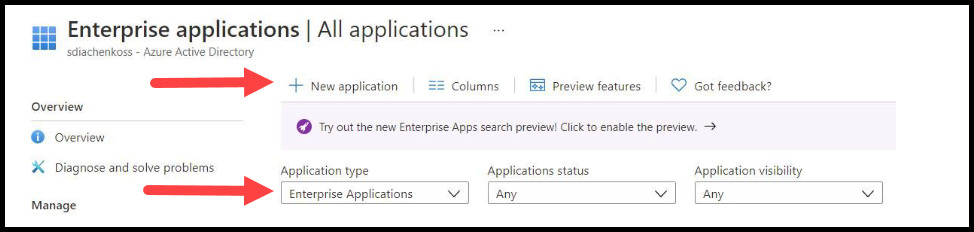
In your Azure tenant, navigate to Azure Active Directory and select Enterprise Applications. Click the New Application button.
-
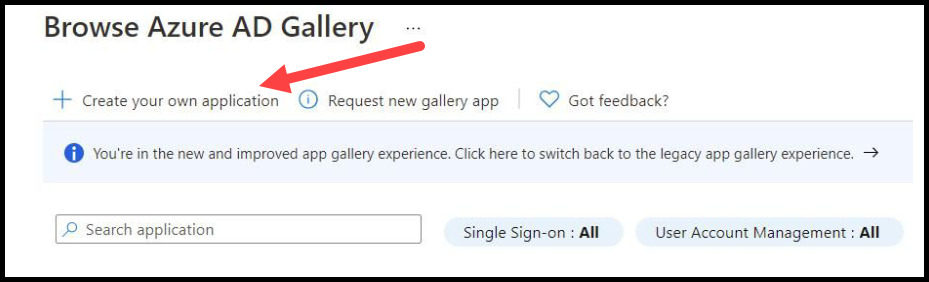
Tap Create your application.
-
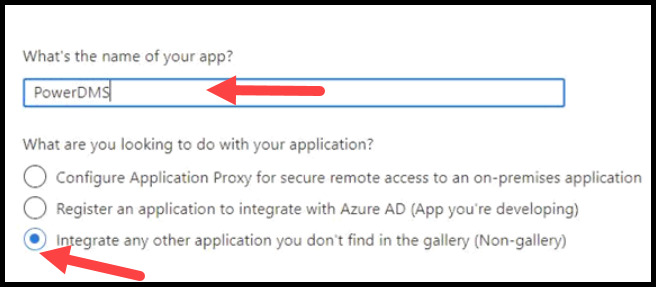
Provide a name for the application and select the radio button next to Integrate any other application you don't find in the gallery (Non-gallery).
-
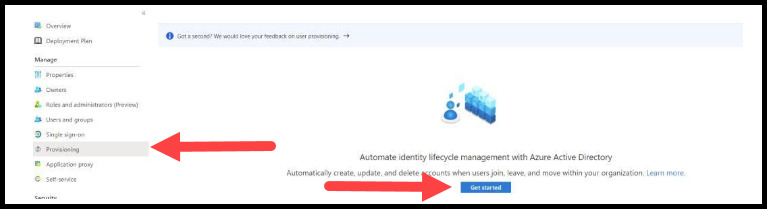
After you build the application, navigate back to the Enterprise Applications list, select Provisioning under the Manage menu on the left side of your screen, then click the Get Started button.
-
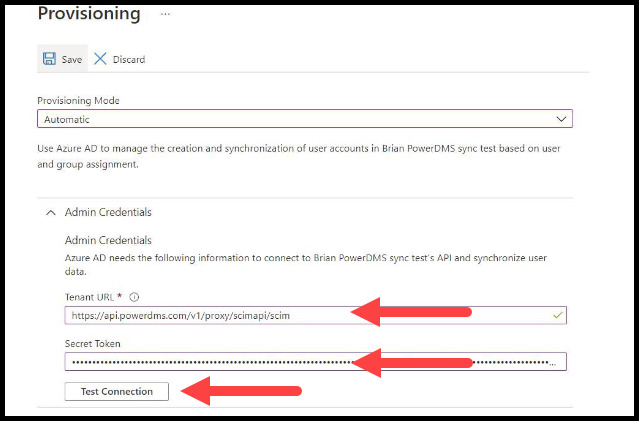
On the next page, select Automatic from the Provisioning Mode drop-down menu. Enter the following as the tenant URL: https://api.powerdms.com/v1/proxy/scimapi/scim andthe JWT token you copied from your Administration Menu > User Sync > page into the Secret Token field, then click the Test Connection button.
-
After the test concludes successfully, click Save. If the test fails, return to the Administration Menu > User Sync page to generate a new JWT token.
You can enter an email address under Settings to be notified of a provisioning failure.

-
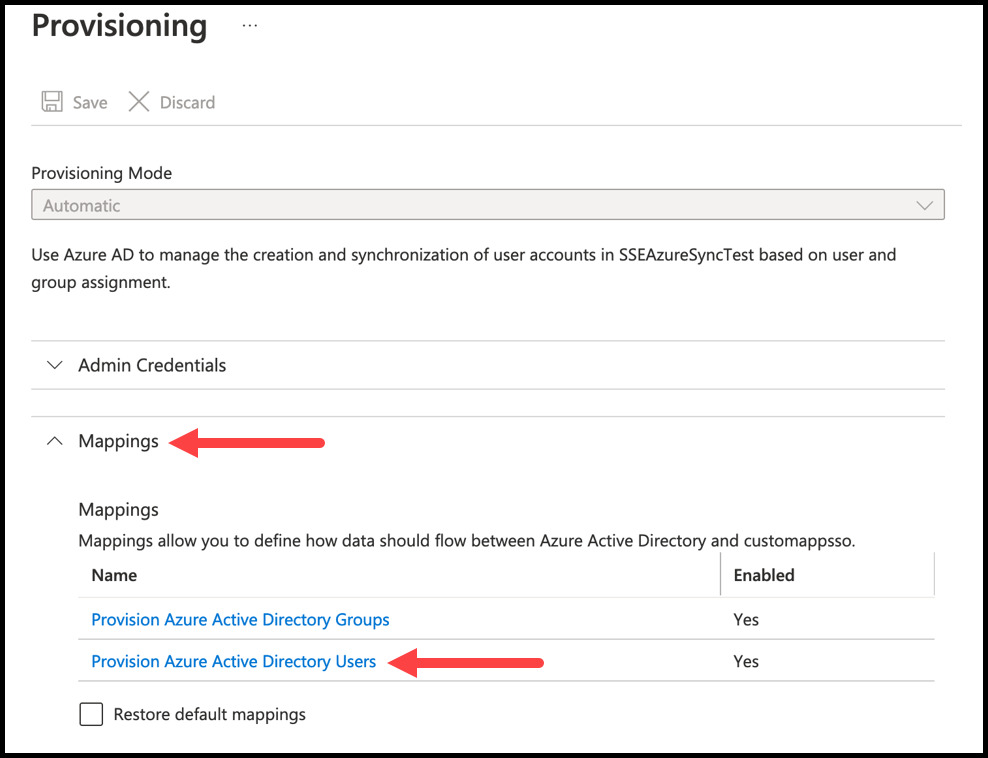
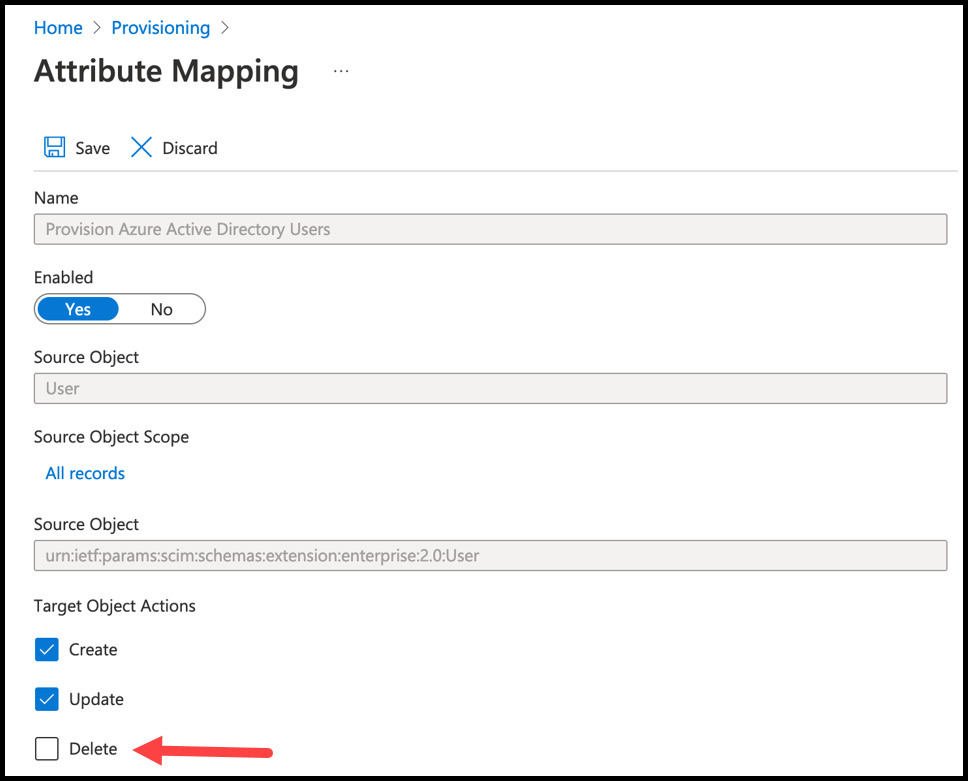
Next, expand Mappings and click Provision Azure Active Directory Users.
-
Under Target Object Actions, uncheck the Delete option.
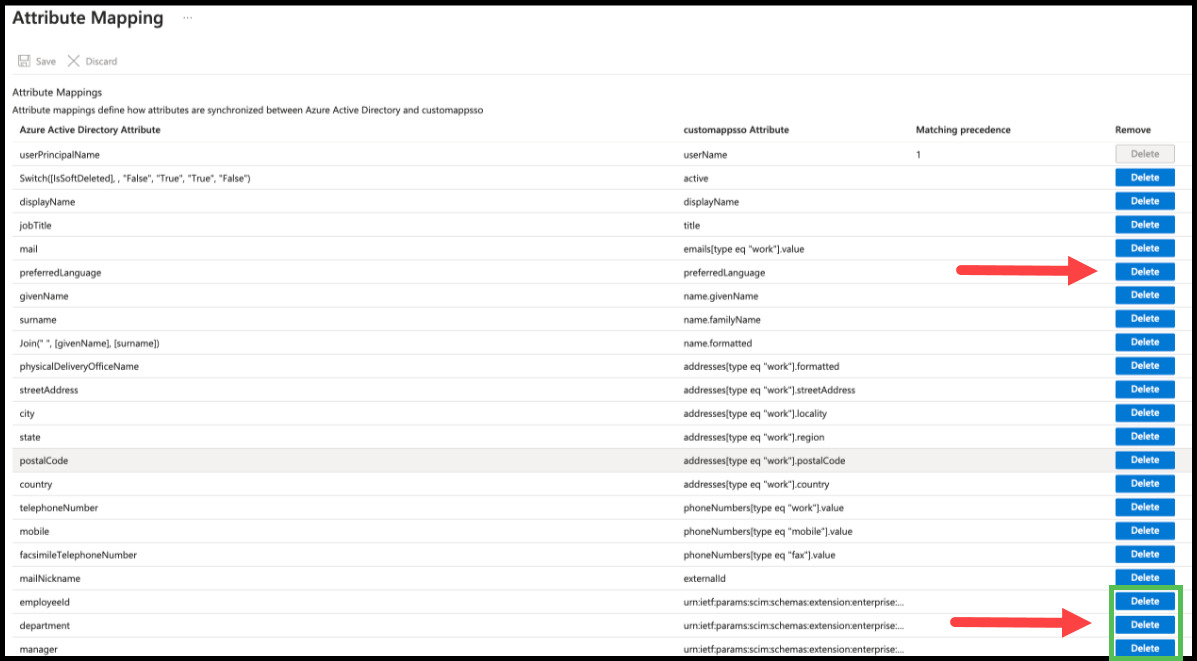
-
Under Attribute Mappings, delete the following attributes (your SCIM schema does not support these):
-
preferred language
-
employeeId
-
department
-
manager
-
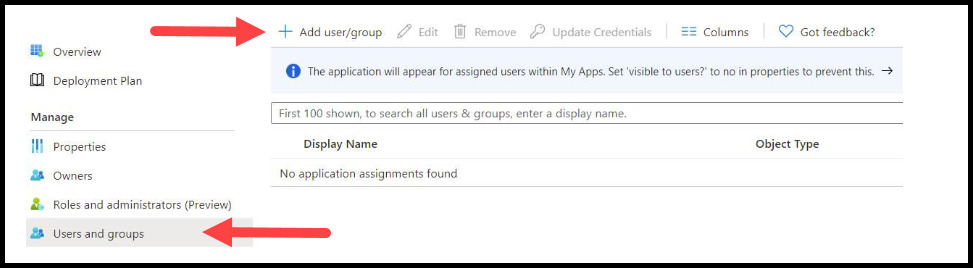
Click Save and navigate back to the top level of the Enterprise Application. Under the Manage menu, select Users and Groups, then click the Add user/group button.
-
Click the None Selected hyperlink to bring up the Group/User picker. In this pane, select the groups to be synced into PowerDMS.

-
Repeat step 14 until you've selected all groups.

-
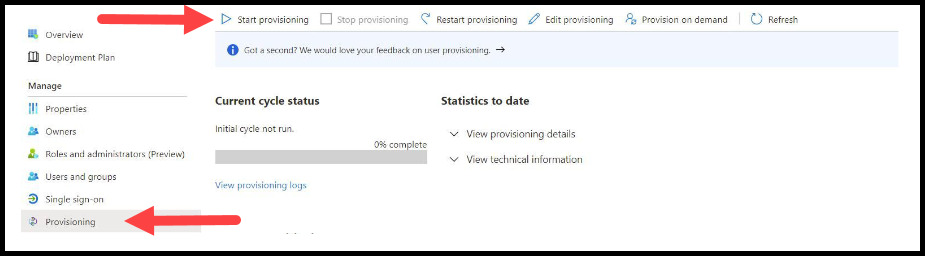
When you're finished picking groups, click Select, Assign, and then navigate to your Manage menu. Select Provisioning, then click the Start Provisioning button. It may take up to 40 minutes before Azure begins the user provisioning process.
RELATED ARTICLES
Article: PowerDMS Azure AD Application Configuration
SECURITY REQUIRED
Site Administrator